Kubernetes on Ubuntu 18.04 - Master and Dashboard setup
This post i am going to show how to install Kubernetes, configure Master node and enable Kubernetes dashboard in Ubuntu 18.04 LTS. I also tried to show the video demo explaining the entire configuration in the end of this post, This is my first video demo!!!
This post has been updated for kubernetes version 1.18
Setup
I am using the Virtualbox(running in Ubuntu 18.04 physical machine) for this entire setup . The physical machine is Dell inspiron laptop with 12GB RAM , Intel® Core™ i7-6500U CPU @ 2.50GHz × 4 and 512GB SSD hardisk.
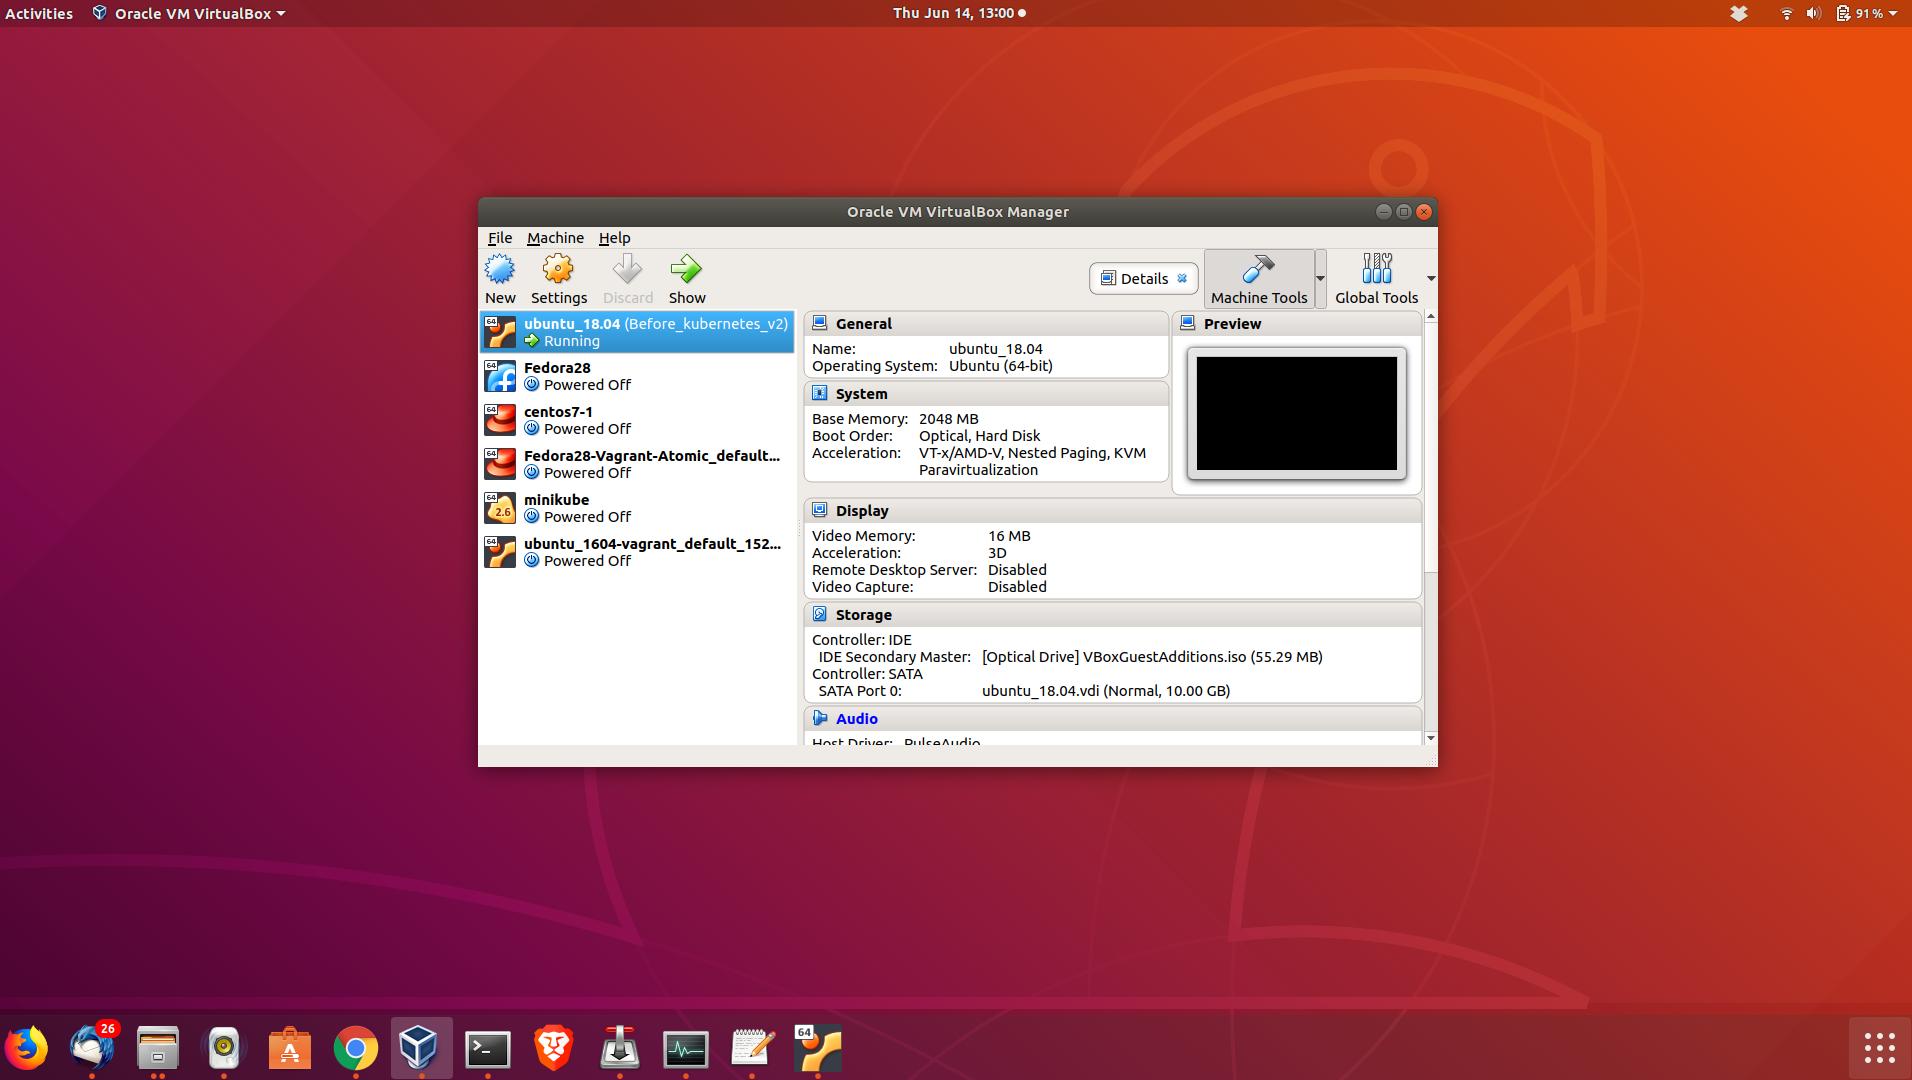
First install docker, it is provided by the default ubuntu 18.04 repository.
sudo apt-get install docker.ioEnable docker to auto start during reboot
sudo systemctl enable dockerSynchronizing state of docker.service with SysV service script with /lib/systemd/systemd-sysv-install.Executing: /lib/systemd/systemd-sysv-install enable docker

``````bash
sudo apt-get install curl
Download the gpg key for kubernetes installation and add to ubuntu
curl -s https://packages.cloud.google.com/apt/doc/apt-key.gpg | sudo apt-key addOKNow add the Google’s kubernetes repository
sudo apt-add-repository "deb http://apt.kubernetes.io/ kubernetes-xenial main"Install kubeadm
sudo apt-get install kubeadmIf you want to disable the swap permanantly, edit /etc/fstab and comment the swap filesystem line. Kubernetes will not start if swap is enabled.
sudo swapoff -aMy IP address of the VM is 10.0.0.1 which i am going to advertise as apiserver and 40.168.0.0/16 is the newtwork for pod communication
sudo kubeadm init --pod-network-cidr=40.168.0.0/16 --apiserver-advertise-address=10.0.0.1
W0624 14:54:54.575835    4007 configset.go:202] WARNING: kubeadm cannot validate component configs for API groups [kubelet.config.k8s.io kubeproxy.config.k8s.io][init] Using Kubernetes version: v1.18.4[preflight] Running pre-flight checks  [WARNING IsDockerSystemdCheck]: detected "cgroupfs" as the Docker cgroup driver. The recommended driver is "systemd". Please follow the guide at https://kubernetes.io/docs/setup/cri/[preflight] Pulling images required for setting up a Kubernetes cluster[preflight] This might take a minute or two, depending on the speed of your internet connection[preflight] You can also perform this action in beforehand using 'kubeadm config images pull'[kubelet-start] Writing kubelet environment file with flags to file "/var/lib/kubelet/kubeadm-flags.env"[kubelet-start] Writing kubelet configuration to file "/var/lib/kubelet/config.yaml"[kubelet-start] Starting the kubelet[certs] Using certificateDir folder "/etc/kubernetes/pki"[certs] Generating "ca" certificate and key[certs] Generating "apiserver" certificate and key[certs] apiserver serving cert is signed for DNS names [kubernetes1 kubernetes kubernetes.default kubernetes.default.svc kubernetes.default.svc.cluster.local] and IPs [10.96.0.1 10.0.0.1][certs] Generating "apiserver-kubelet-client" certificate and key[certs] Generating "front-proxy-ca" certificate and key[certs] Generating "front-proxy-client" certificate and key[certs] Generating "etcd/ca" certificate and key[certs] Generating "etcd/server" certificate and key[certs] etcd/server serving cert is signed for DNS names [kubernetes1 localhost] and IPs [10.0.0.1 127.0.0.1 ::1][certs] Generating "etcd/peer" certificate and key[certs] etcd/peer serving cert is signed for DNS names [kubernetes1 localhost] and IPs [10.0.0.1 127.0.0.1 ::1][certs] Generating "etcd/healthcheck-client" certificate and key[certs] Generating "apiserver-etcd-client" certificate and key[certs] Generating "sa" key and public key[kubeconfig] Using kubeconfig folder "/etc/kubernetes"[kubeconfig] Writing "admin.conf" kubeconfig file[kubeconfig] Writing "kubelet.conf" kubeconfig file[kubeconfig] Writing "controller-manager.conf" kubeconfig file[kubeconfig] Writing "scheduler.conf" kubeconfig file[control-plane] Using manifest folder "/etc/kubernetes/manifests"[control-plane] Creating static Pod manifest for "kube-apiserver"[control-plane] Creating static Pod manifest for "kube-controller-manager"W0624 14:57:38.087288    4007 manifests.go:225] the default kube-apiserver authorization-mode is "Node,RBAC"; using "Node,RBAC"[control-plane] Creating static Pod manifest for "kube-scheduler"W0624 14:57:38.089706    4007 manifests.go:225] the default kube-apiserver authorization-mode is "Node,RBAC"; using "Node,RBAC"[etcd] Creating static Pod manifest for local etcd in "/etc/kubernetes/manifests"[wait-control-plane] Waiting for the kubelet to boot up the control plane as static Pods from directory "/etc/kubernetes/manifests". This can take up to 4m0s[apiclient] All control plane components are healthy after 21.003160 seconds[upload-config] Storing the configuration used in ConfigMap "kubeadm-config" in the "kube-system" Namespace[kubelet] Creating a ConfigMap "kubelet-config-1.18" in namespace kube-system with the configuration for the kubelets in the cluster[upload-certs] Skipping phase. Please see --upload-certs[mark-control-plane] Marking the node kubernetes1 as control-plane by adding the label "node-role.kubernetes.io/master=''"[mark-control-plane] Marking the node kubernetes1 as control-plane by adding the taints [node-role.kubernetes.io/master:NoSchedule][bootstrap-token] Using token: u9ibqd.0x3nkr0lze6o5d7u[bootstrap-token] Configuring bootstrap tokens, cluster-info ConfigMap, RBAC Roles[bootstrap-token] configured RBAC rules to allow Node Bootstrap tokens to get nodes[bootstrap-token] configured RBAC rules to allow Node Bootstrap tokens to post CSRs in order for nodes to get long term certificate credentials[bootstrap-token] configured RBAC rules to allow the csrapprover controller automatically approve CSRs from a Node Bootstrap Token[bootstrap-token] configured RBAC rules to allow certificate rotation for all node client certificates in the cluster[bootstrap-token] Creating the "cluster-info" ConfigMap in the "kube-public" namespace[kubelet-finalize] Updating "/etc/kubernetes/kubelet.conf" to point to a rotatable kubelet client certificate and key[addons] Applied essential addon: CoreDNS[addons] Applied essential addon: kube-proxy
Your Kubernetes control-plane has initialized successfully!
To start using your cluster, you need to run the following as a regular user:
  mkdir -p $HOME/.kube  sudo cp -i /etc/kubernetes/admin.conf $HOME/.kube/config  sudo chown $(id -u):$(id -g) $HOME/.kube/config
You should now deploy a pod network to the cluster.Run "kubectl apply -f [podnetwork].yaml" with one of the options listed at:  https://kubernetes.io/docs/concepts/cluster-administration/addons/
Then you can join any number of worker nodes by running the following on each as root:
kubeadm join 10.0.0.1:6443 --token u9ibqd.0x3nkr0lze6o5d7u \    --discovery-token-ca-cert-hash sha256:9669e0ef3814e40ab4a3c2c85a450635ad6c75c25be931fdd064fda9fb9e7b89
Take a note of the join command, this will be used to join the other nodes to this kubernetes cluster.
The token generated is valid only for 24hours. In case the 24 hours exceed we need to generate the new token using the command “sudo kubeadm token create” .The current token can be view from master using the below command.
sudo kubeadm token list
TOKEN TTL EXPIRES USAGES DESCRIPTION EXTRA GROUPSo9an7t.o4bs1up74xjwnol3 1h 2018-06-15T14:39:02+05:30 authentication,signing The default bootstrap token generated by 'kubeadm init'. system:bootstrappers:kubeadm:default-node-token
The CA cert hash is used for the node to join in secure manner. This also can be view from the below command. Combaining this token and hash we can join the nodes.
openssl x509 -pubkey -in /etc/kubernetes/pki/ca.crt | openssl rsa -pubin -outform der 2>/dev/null | openssl dgst -sha256 -hex | sed 's/^.* //'
548c922cf4f845f3dc6d7da407516652879c8a5085c87e0322770e1475105591
Create the necessary directories
mkdir -p $HOME/.kubesudo cp -i /etc/kubernetes/admin.conf $HOME/.kube/configsudo chown $(id -u):$(id -g) $HOME/.kube/configNow deploy the network for pod communications , i am using the calico networking
sudo kubectl apply -f https://docs.projectcalico.org/v3.14/manifests/calico.yaml
configmap/calico-config createdcustomresourcedefinition.apiextensions.k8s.io/bgpconfigurations.crd.projectcalico.org createdcustomresourcedefinition.apiextensions.k8s.io/bgppeers.crd.projectcalico.org createdcustomresourcedefinition.apiextensions.k8s.io/blockaffinities.crd.projectcalico.org createdcustomresourcedefinition.apiextensions.k8s.io/clusterinformations.crd.projectcalico.org createdcustomresourcedefinition.apiextensions.k8s.io/felixconfigurations.crd.projectcalico.org createdcustomresourcedefinition.apiextensions.k8s.io/globalnetworkpolicies.crd.projectcalico.org createdcustomresourcedefinition.apiextensions.k8s.io/globalnetworksets.crd.projectcalico.org createdcustomresourcedefinition.apiextensions.k8s.io/hostendpoints.crd.projectcalico.org createdcustomresourcedefinition.apiextensions.k8s.io/ipamblocks.crd.projectcalico.org createdcustomresourcedefinition.apiextensions.k8s.io/ipamconfigs.crd.projectcalico.org createdcustomresourcedefinition.apiextensions.k8s.io/ipamhandles.crd.projectcalico.org createdcustomresourcedefinition.apiextensions.k8s.io/ippools.crd.projectcalico.org createdcustomresourcedefinition.apiextensions.k8s.io/kubecontrollersconfigurations.crd.projectcalico.org createdcustomresourcedefinition.apiextensions.k8s.io/networkpolicies.crd.projectcalico.org createdcustomresourcedefinition.apiextensions.k8s.io/networksets.crd.projectcalico.org createdclusterrole.rbac.authorization.k8s.io/calico-kube-controllers createdclusterrolebinding.rbac.authorization.k8s.io/calico-kube-controllers createdclusterrole.rbac.authorization.k8s.io/calico-node createdclusterrolebinding.rbac.authorization.k8s.io/calico-node createddaemonset.apps/calico-node createdserviceaccount/calico-node createddeployment.apps/calico-kube-controllers createdserviceaccount/calico-kube-controllers created
Now wait for all pods to change to “Running” status. At this point all the pods should be in running status.
sudo kubectl get pods --all-namespacesNAMESPACE NAME READY STATUS RESTARTS AGEkube-system calico-kube-controllers-76d4774d89-mfjdf 0/1 Running 0 7m29skube-system calico-node-lfz6b 1/1 Running 0 7m29skube-system coredns-66bff467f8-kg47r 1/1 Running 0 8m15skube-system coredns-66bff467f8-mbl88 1/1 Running 0 8m16skube-system etcd-kubernetes1 1/1 Running 1 8m24skube-system kube-apiserver-kubernetes1 1/1 Running 1 8m24skube-system kube-controller-manager-kubernetes1 1/1 Running 1 8m24skube-system kube-proxy-t2rmj 1/1 Running 1 8m16skube-system kube-scheduler-kubernetes1 1/1 Running 1 8m24sNow deploy the kubernetes dashoard. Kubernetes dashboard is used to manage the kubernetes cluster using the web GUI interface.
kubectl apply -f https://raw.githubusercontent.com/kubernetes/dashboard/v2.0.0/aio/deploy/recommended.yamlnamespace/kubernetes-dashboard createdserviceaccount/kubernetes-dashboard createdservice/kubernetes-dashboard created
secret/kubernetes-dashboard-certs createdsecret/kubernetes-dashboard-csrf createdsecret/kubernetes-dashboard-key-holder createdconfigmap/kubernetes-dashboard-settings createdrole.rbac.authorization.k8s.io/kubernetes-dashboard createdclusterrole.rbac.authorization.k8s.io/kubernetes-dashboard createdrolebinding.rbac.authorization.k8s.io/kubernetes-dashboard createdclusterrolebinding.rbac.authorization.k8s.io/kubernetes-dashboard createddeployment.apps/kubernetes-dashboard createdservice/dashboard-metrics-scraper createddeployment.apps/dashboard-metrics-scraper created
Wait for kubernetes-dashboard-xxxx pods to goes “Running” status
sudo kubectl get pods --all-namespacesNAMESPACE NAME READY STATUS RESTARTS AGEkube-system calico-kube-controllers-76d4774d89-mfjdf 1/1 Running 0 10mkube-system calico-node-lfz6b 1/1 Running 0 10mkube-system coredns-66bff467f8-kg47r 1/1 Running 0 11mkube-system coredns-66bff467f8-mbl88 1/1 Running 0 11mkube-system etcd-kubernetes1 1/1 Running 1 11mkube-system kube-apiserver-kubernetes1 1/1 Running 1 11mkube-system kube-controller-manager-kubernetes1 1/1 Running 1 11mkube-system kube-proxy-t2rmj 1/1 Running 1 11mkube-system kube-scheduler-kubernetes1 1/1 Running 1 11mkubernetes-dashboard dashboard-metrics-scraper-6b4884c9d5-j757b 1/1 Running 0 51skubernetes-dashboard kubernetes-dashboard-7b544877d5-pklbm 1/1 Running 0 52sOnce the kubernetes-dashboard-xxxxxxx container goes to “Running” state we can start the kubectly proxy with the below command. If you want to start only in localhost then you can change the address option to localhost
sudo kubectl proxy --address=0.0.0.0
Starting to serve on [::]:8001
Now open the below kubernetes dashboard URL in browser
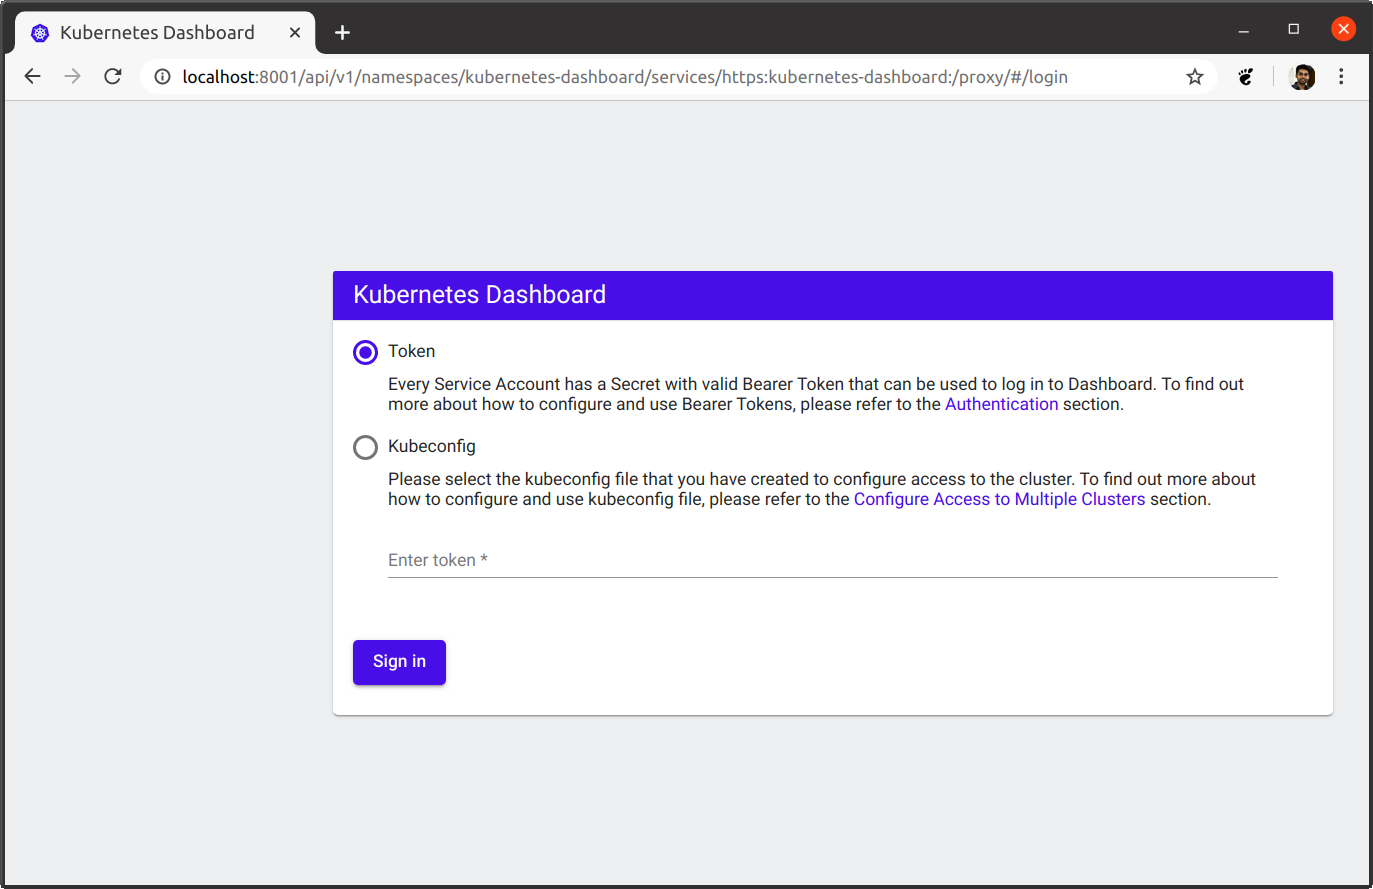
To properly login to the kubernetes dashboard we need to creat a service account and assign the proper role.
kubectl create serviceaccount dashboard -n default
serviceaccount "dashboard" createdkubectl create clusterrolebinding dashboard-admin -n default --clusterrole=cluster-admin --serviceaccount=default:dashboard
clusterrolebinding.rbac.authorization.k8s.io "dashboard-admin" createdNow the password to login kubernetes dashboard can be viewed by running the below command. Copy the decoded password and login to dashboard.
kubectl get secret $(kubectl get serviceaccount dashboard -o jsonpath="{.secrets[0].name}") -o jsonpath="{.data.token}" | base64 --decode
eyJhbGciOiJSUzI1NiIsImtpZCI6IiJ9.eyJpc3MiOiJrdWJlcm5ldGVzL3NlcnZpY2VhY2NvdW50Iiwia3ViZXJuZXRlcy5pby9zZXJ2aWNlYWNjb3VudC9uYW1lc3BhY2UiOiJkZWZhdWx0Iiwia3ViZXJuZXRlcy5pby9zZXJ2aWNlYWNjb3VudC9zZWNyZXQubmFtZSI6ImRhc2hib2FyZC10b2tlbi1nOGxnZCIsImt1YmVybmV0ZXMuaW8vc2VydmljZWFjY291bnQvc2VydmljZS1hY2NvdW50Lm5hbWUiOiJkYXNoYm9hcmQiLCJrdWJlcm5ldGVzLmlvL3NlcnZpY2VhY2NvdW50L3NlcnZpY2UtYWNjb3VudC51aWQiOiI1MDU1ZmE1ZC02ZmI0LTExZTgtOTgzZi0wODAwMjcxNjVmMDYiLCJzdWIiOiJzeXN0ZW06c2VydmljZWFjY291bnQ6ZGVmYXVsdDpkYXNoYm9hcmQifQ.LAdmbfTmx8HACuZy3hRJzS4rP7LH2PaSi85oeNnuP4tWbtSVqonnkXNrENsrODA0zE8Dh77rCrKWM3j3HElJF8Wy3TzYVa2aopBxbIrqZgwESfeuUhhjc5twEE_zrxyVpbch1-lU_ye29li2iYn1649yDYosxBhKsic9A3dOtGWJuiTmFTYrt1cwzKRC201yAIdxxP6BiIm_h8nK5pAw_TPpF1tOxo_P4Zy9msn8tDR1NM_GX5Q10FJO8Ef7zNgFr9jgh_b_BnCj61niiIKzGJYzXs0b3Q3nvohoGfeGavTpG1eMc26-rJ1MwCT1beOvdkJv4DyjJFENPcZaalY0yw
Video hands-on demo
My next post on kubernetes Kubernetes scaling the cluster
Comments