⬅ Back to Intro | Next → Part 8 - JWT and End-User Authentication
💡 This post is part of my Istio Hands-on Series — a practical journey into Kubernetes Service Mesh. Each post builds on the previous one with hands-on labs, real command outputs, and clear explanations aimed at learning Istio by doing, not just reading.
Objective
In this post, we’ll:
- Enable and verify mutual TLS (mTLS) between services
- Apply AuthorizationPolicies to control access
- Test what happens when policies block or allow traffic
By the end, your frontend–backend app will communicate securely - every request encrypted and identity-verified.
Step 1: Confirm the Setup
You should already have:
- Istio 1.27+ installed
frontend→backendapp working- Sidecar injection enabled
Check that sidecars are active:
kubectl get pods -l app=backend -o jsonpath='{.items[*].spec.initContainers[*].name} {.items[*].spec.containers[*].name}'
✅ Should include istio-proxy.
Step 2: Enable mTLS in the Mesh
Create a PeerAuthentication policy to enforce mTLS mesh-wide:
cat <<EOF | kubectl apply -f -
apiVersion: security.istio.io/v1
kind: PeerAuthentication
metadata:
  name: default
  namespace: istio-system
spec:
  mtls:
    mode: STRICT
EOF
This tells all workloads in the mesh to require mTLS for communication.
Verify:
kubectl get peerauthentication -A
✅ Output should say:
NAMESPACE      NAME      MODE     AGE
istio-system   default   STRICT   71m
Check at pod level:
istioctl x describe pod backend-xxxxxx-wntdp
✅ Output should say:
Pod: backend-684d96759f-wntdp
   Pod Revision: default
   Pod Ports: 5678 (backend)
--------------------
Service: backend
   Port:  80/auto-detect targets pod port 5678
DestinationRule: backend for "backend"
   WARNING POD DOES NOT MATCH ANY SUBSETS.  (Non matching subsets v1,v2)
   Matching subsets:
      (Non-matching subsets v1,v2)
   No Traffic Policy
--------------------
Effective PeerAuthentication:
   Workload mTLS mode: STRICT
Applied PeerAuthentication:
   default.istio-system
Step 3: Understand Identities and Service Accounts
When mTLS is enabled, Istio assigns each workload a SPIFFE identity derived from its Kubernetes ServiceAccount .
Example identity:
spiffe://cluster.local/ns/default/sa/frontend-sa
This is the foundation for all access control decisions.
By default, all pods use the default ServiceAccount — which means they share the same identity (and Istio can’t distinguish between them).
So first, we’ll fix that.
Step 4: Create Dedicated Service Accounts
Create one for each app:
kubectl create sa frontend-sa
kubectl create sa backend-sa
Update deployments to use them:
kubectl patch deploy frontend -p '{"spec":{"template":{"spec":{"serviceAccountName":"frontend-sa"}}}}'
kubectl patch deploy backend -p '{"spec":{"template":{"spec":{"serviceAccountName":"backend-sa"}}}}'
Wait for pods to restart:
kubectl get pods
✅ Both frontend and backend should now be using distinct service accounts.
Step 5: Apply a “Deny All” Policy
Now we’ll start from a locked-down baseline:
cat <<EOF | kubectl apply -f -
apiVersion: security.istio.io/v1
kind: AuthorizationPolicy
metadata:
  name: deny-all
  namespace: default
spec: {}
EOF
This blocks all traffic to all workloads in the namespace — until specific “allow” policies are defined.
Step 6: Allow Frontend → Backend Traffic
Next, explicitly allow only the frontend workload to talk to backend.
cat <<EOF | kubectl apply -f -
apiVersion: security.istio.io/v1
kind: AuthorizationPolicy
metadata:
  name: backend-allow-frontend
  namespace: default
spec:
  selector:
    matchLabels:
      app: backend
  action: ALLOW
  rules:
  - from:
    - source:
        principals:
        - cluster.local/ns/default/sa/frontend-sa
EOF
This says:
Only workloads running as the ServiceAccount
frontend-sacan access pods labeledapp=backend.
Step 7: Test the Policy
✅ From frontend (allowed):
kubectl exec deploy/frontend -- curl -s -o /dev/null -w "%{http_code}\n" http://backend
Expected:
200
❌ From an intruder (denied):
kubectl run test --image=curlimages/curl -it --rm -- /bin/sh
curl -s -o /dev/null -w "%{http_code}\n" http://backend
Expected:
403
If you still get 200, double-check:
- Backend and frontend use different service accounts (
frontend-sa,backend-sa) - mTLS mode is
STRICT(notPERMISSIVE)
Step 8: Understanding Policy Precedence
A common confusion (you likely faced this) is that your namespace-level deny-all didn’t seem to block requests.
Here’s why:
| Policy Scope | Example | Behavior |
|---|---|---|
Namespace-wide (spec: {}) | deny-all | Applies only when no workload-specific policy exists |
Workload-specific (selector: app=backend) | backend-allow-frontend | Overrides namespace-wide rules |
💡 So when both exist, the workload-specific rule (backend-allow-frontend) takes precedence.
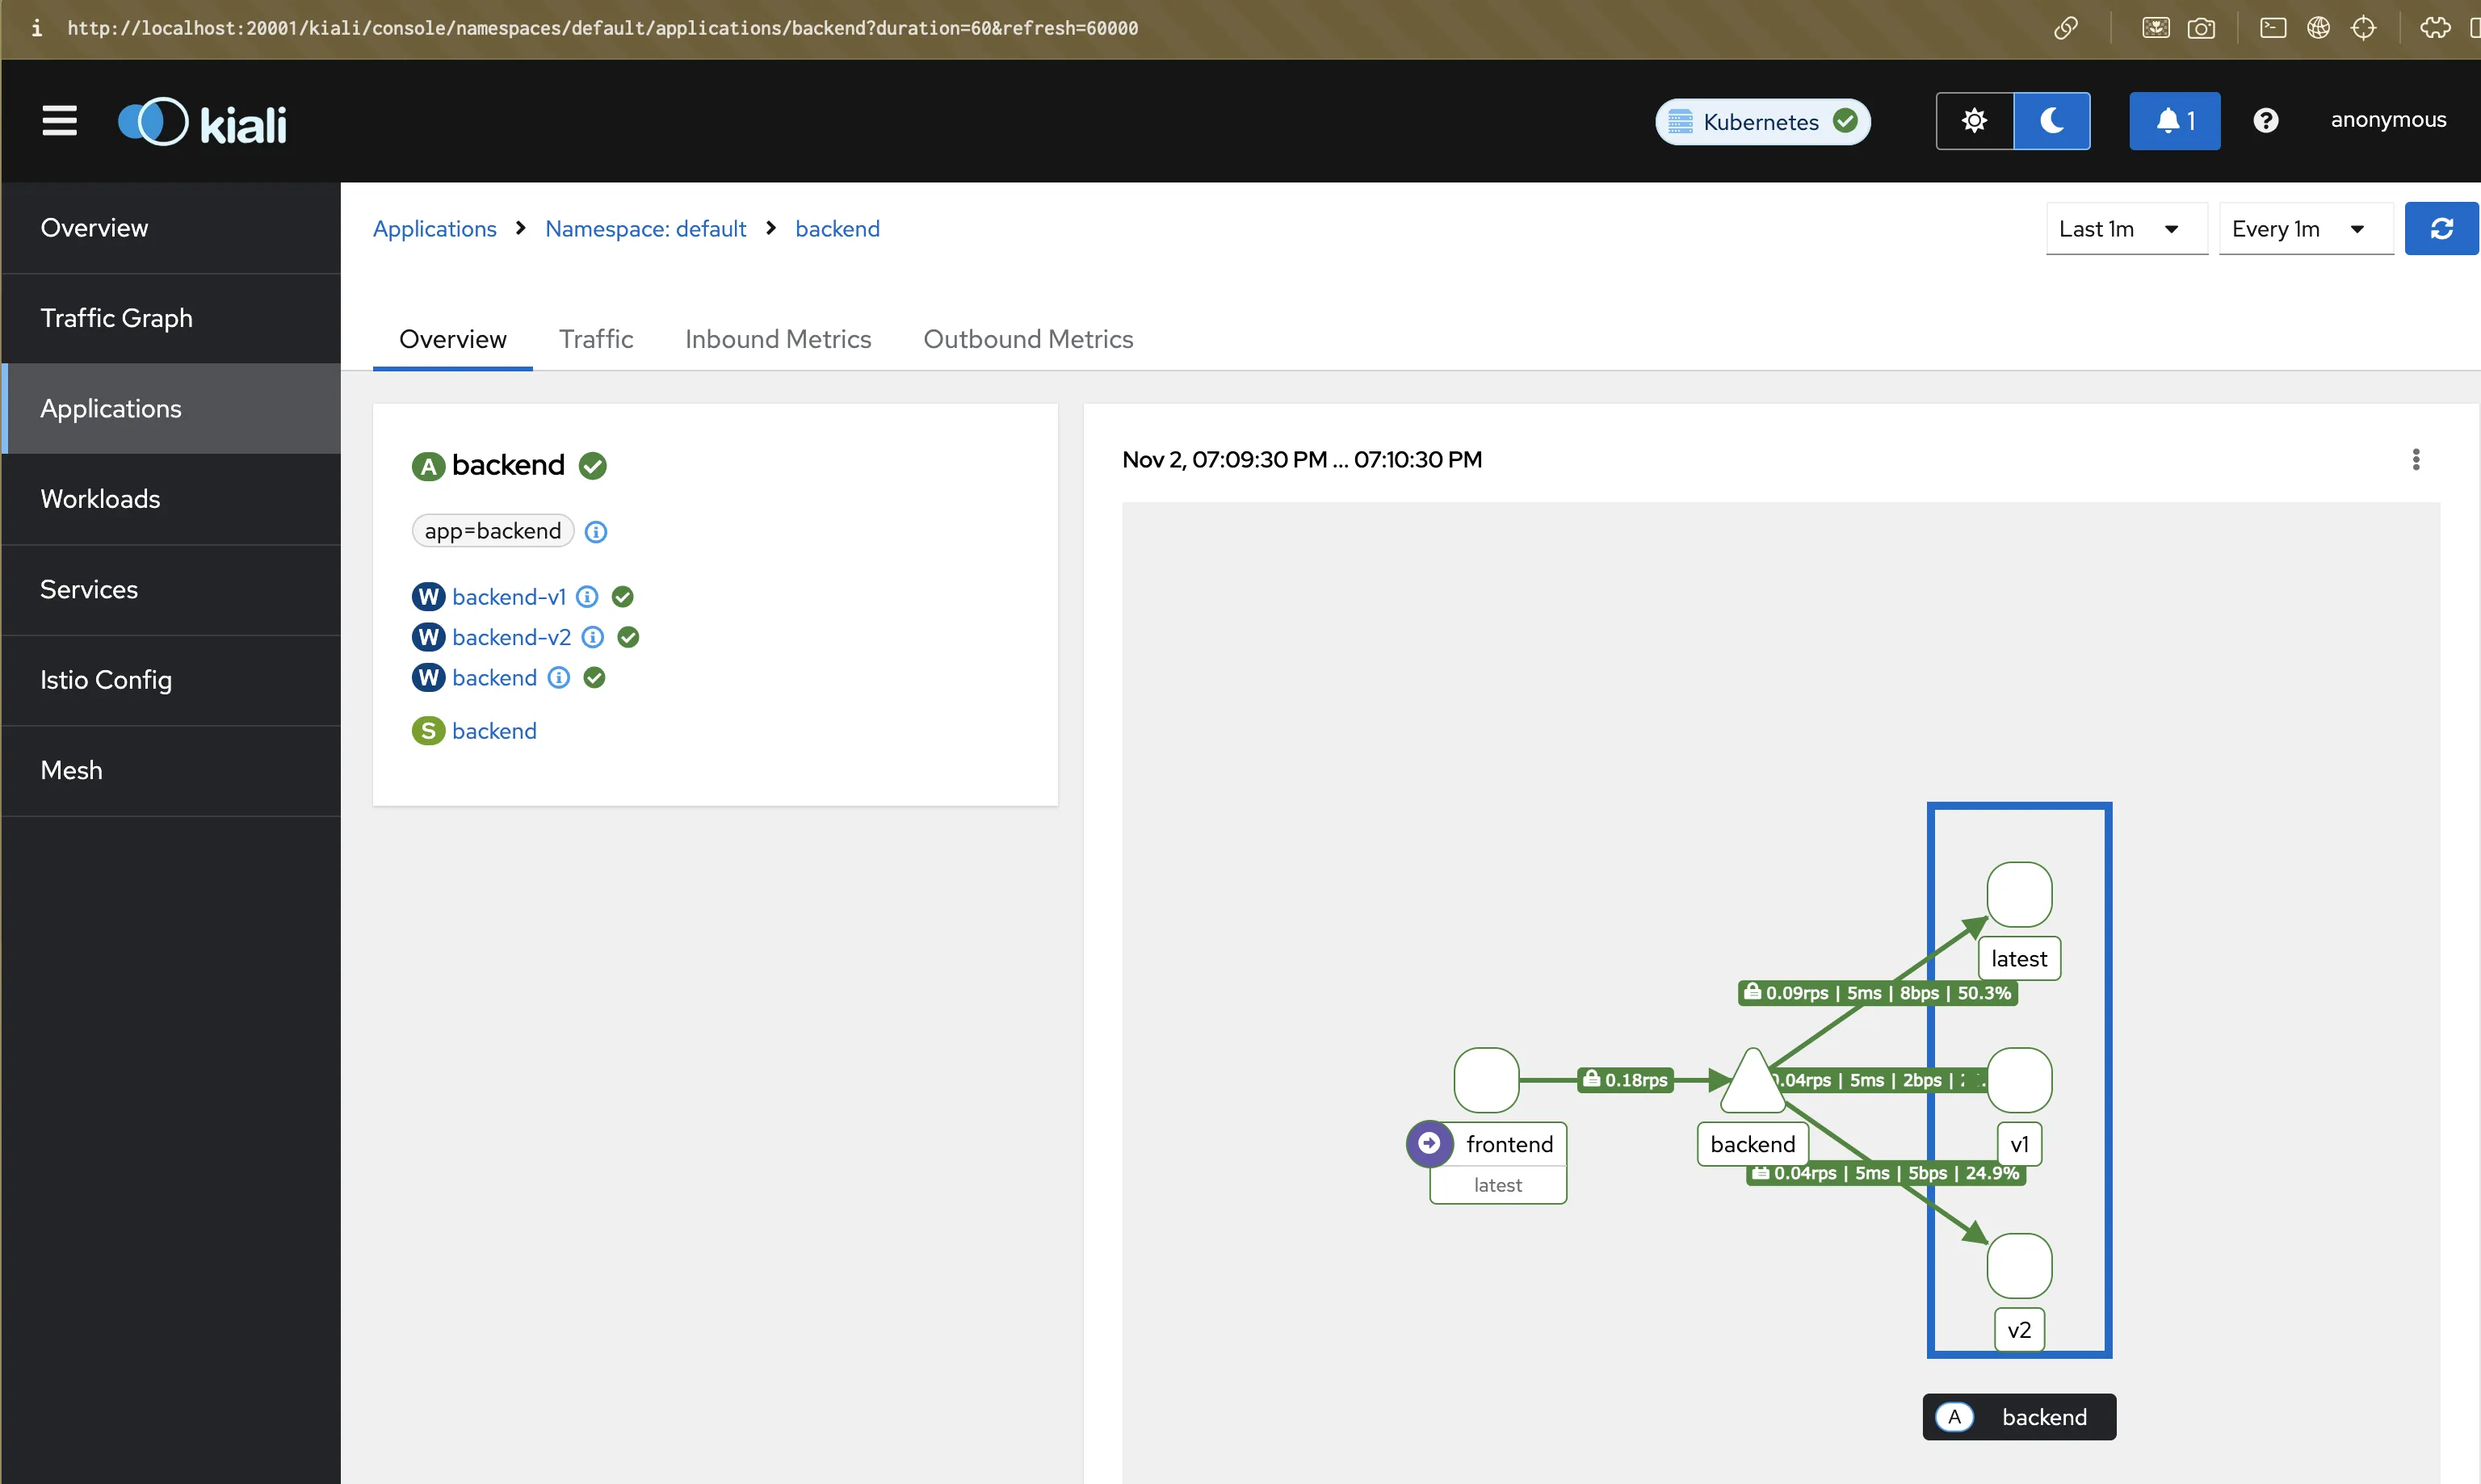
Step 9: Visualize in Kiali
Forward the Kiali dashboard:
kubectl port-forward svc/kiali -n istio-system 20001:20001
Go to http://localhost:20001 → Graph → select default namespace.
- You’ll see lock icons on edges → confirms mTLS
- Hover over edges to see allowed/denied traffic
- “Istio Config” tab → shows both AuthorizationPolicies
Screenshot:
Step 10: Summary
In this post, you:
- Enforced mTLS for encrypted, identity-based communication
- Created dedicated service accounts per workload
- Applied AuthorizationPolicies for fine-grained access control
- Understood why namespace vs workload policies behave differently
Your mesh now follows zero-trust principles :
- 🔐 Encryption by default (mTLS)
- 🧾 Identity-based authorization
- 🚫 Explicit allow/deny rules per workload
🧵 Next Up
👉 Istio Hands-on Part 7 – JWT and End-User Authentication
We’ll extend security beyond workloads and enforce identity-based access for end-users using JWT tokens.
⬅ Back to Intro | Next → Part 8 - JWT and End-User Authentication
Comments